How to Upload Your Photo and Signature on the SSC Form Without Getting Rejected
Signature won't upload on the SSC form? Every rejection — wrong size, wrong dimensions, wrong format, blurred or tilted — has a specific fix. A step-by-step guide to the exact SSC photo and signature
How to Upload Your Photo and Signature on the SSC Form Without Getting Rejected
If you have ever filled an SSC application, you know the moment. You have spent twenty minutes entering your details, you reach the upload step, you select your signature, and the page throws back a cold red error: the file size is not within the permitted range. You try again. Dimensions invalid. Again. Format not allowed. For lakhs of aspirants every recruitment cycle, the photo-and-signature upload is the single most frustrating part of the whole process — not the exam, not the syllabus, but a 20 KB file that refuses to behave.
The good news is that none of this is difficult once you know exactly what the Staff Selection Commission is checking for. Every rejection has a specific, fixable cause, and every requirement is just a number you need to hit. This guide walks through precisely what SSC wants, why your uploads keep failing, and how to produce a photo and signature that are accepted on the first try — and you can do the whole thing in a couple of minutes with the free SSC signature and photo resizer, right in your browser, without installing anything.
What SSC actually checks
When you upload to an SSC form — whether it's the One Time Registration (OTR) or a specific exam like CGL, CHSL, MTS, Constable (GD), Stenographer or a Selection Post — the system runs a few automatic checks on your files. It is not judging how you look or how neat your signature is (that comes later, during document verification). At the upload stage it is checking cold, mechanical properties:
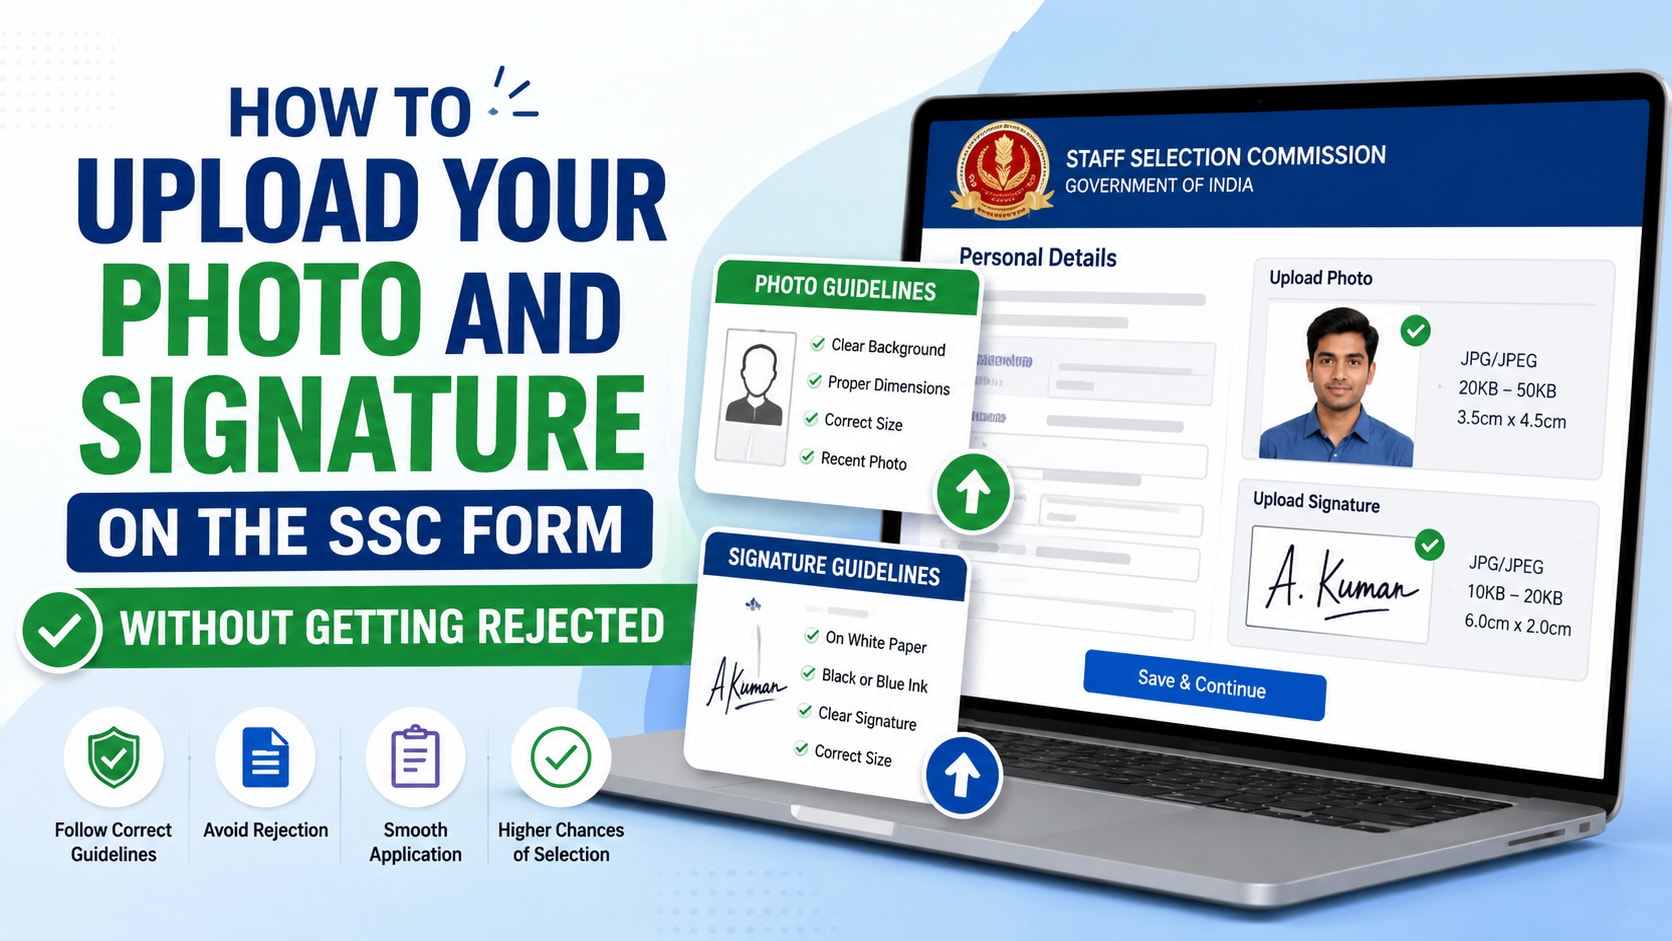
For the signature:
- Format must be JPEG / JPG
- File size between 10 KB and 20 KB
- Dimensions about 6.0 cm wide × 2.0 cm tall (which works out to roughly 709 × 236 pixels at 300 DPI)
- The signature should be clear (not blurred or shrunk to a tiny smudge) and horizontally aligned
For the photograph:
- Format must be JPEG / JPG
- File size between 20 KB and 50 KB
- Dimensions about 3.5 cm × 4.5 cm (roughly 413 × 531 pixels at 300 DPI)
- A recent colour photo, plain light background, face clearly visible without cap or dark glasses
Always glance at the official advisory for your specific notice, because SSC occasionally tweaks these numbers and, in some recent recruitments, has asked for a photograph taken within a recent window or even with your name and the date shown in the frame. The core file specifications above, though, have been stable for years and are what trip up the overwhelming majority of uploads.
Why your signature keeps getting rejected (and the fix for each)
Almost every failed upload falls into one of five buckets. Here is each one, in plain language, with the actual reason it happens.
"Signature size should be less than 20 KB." Your file is too heavy. This usually means you scanned at high resolution or saved at maximum quality, producing a 50–200 KB file. The fix is compression — reducing the JPEG quality until the file slims down below 20 KB. The catch is that doing this by hand in a photo editor is guesswork; you nudge a quality slider, export, check the size, and repeat.
"Signature size should be greater than 10 KB." The opposite problem, and a surprisingly common one. A signature is mostly white paper with a few thin strokes, so it compresses extremely well — often down to 5 or 6 KB, below the minimum. People get stuck here because making the image "bigger" by raising quality barely moves the needle. The proper fix is a little technical: you can pad the file up to the minimum size without changing how it looks at all (more on that below).
"Dimension of the image is not correct." Your pixel size is wrong. SSC wants the signature at a specific width and height, and a random crop from your phone won't match. The fix is resizing to the exact target dimensions.
"Image must be in JPG/JPEG format." You uploaded a PNG, a HEIC (the default on many iPhones), or a screenshot saved as something else. The fix is converting to JPEG.
"Signature is blurred / not clear" or "miniature." This is the one that gets flagged at verification rather than upload, and it's the most serious because it can cost you later. It happens when someone photographs a small signature from far away, or crops a tiny region and stretches it to fill the frame. Enlarging a small image does not add detail — it just magnifies the blur. The fix is to start with a larger, sharper original.
"Signature is not horizontally aligned." Your scan or photo came out tilted. SSC wants the signature roughly level. The fix is a simple rotation to straighten it before you crop.
Notice that satisfying all of these at once — format, size range, exact dimensions, sharpness, and alignment — is genuinely fiddly to do by hand. That is exactly why a purpose-built tool helps so much.
The clean, no-rejection method (step by step)
Here is the sequence that works every time. You can follow it in any image editor, but the SSC signature and photo resizer does each step automatically, so I'll describe it through that.
Step 1 — Start with a good original. For your signature, sign large on plain white paper with a black or blue pen, then photograph it straight-on in good light or scan it. "Large and sharp" matters: it is always easier to shrink a big, clear image than to rescue a tiny, fuzzy one. For your photo, use a recent, well-lit colour photograph against a plain background.
Step 2 — Pick the right mode. Open the tool and choose Signature (it opens here by default) or Photograph. Each mode automatically loads the correct SSC dimensions and KB limits, so you don't have to remember any numbers.
Step 3 — Straighten and crop. If your scan is tilted, tap the rotate buttons until the signature sits level. Then drag the crop box — which is locked to the exact SSC proportions — over your signature (or your face, in photo mode). Because the ratio is fixed, you cannot accidentally crop it to the wrong shape.
Step 4 — Generate. Press the button and the tool resizes your crop to the precise pixel dimensions, fills any transparent areas with white, and then automatically tunes the JPEG quality until the file lands inside the allowed size window. If your signature is so plain that it compresses below the minimum, the tool quietly pads the file back above 10 KB — without altering a single visible pixel — so it passes the "too small" check. It also writes 300 DPI into the file, which is what the requirement asks for.
Step 5 — Check the green light and download. A size gauge turns green when the file is inside the allowed range, and a checklist confirms format, dimensions and sharpness. Download the JPEG and upload it to the SSC form. That's it.
The entire thing happens inside your browser. Your photo and signature are never sent to any server, which matters: these are personal documents, and there's no reason a stranger's website should receive them just to resize a file.
The "too small" trap, explained
This deserves a moment because it confuses even careful people. You'd think a bigger image means a bigger file, so when your signature comes out under 10 KB, the instinct is to increase its dimensions. But a signature is so simple — white background, a few strokes — that JPEG compresses it to almost nothing regardless of dimensions. You can keep enlarging it and still sit stubbornly under the minimum.
The real, clean solution is something most people never learn: a JPEG file can carry harmless extra data in a "comment" section that the image ignores completely. By adding a small amount of this filler, the file's size rises into the required range while the picture stays pixel-for-pixel identical. SSC checks the file size, the image still displays perfectly, and everyone is happy. A good resizing tool does this for you automatically, which is why your too-small signature suddenly fits without you having to do anything strange to the image itself.
Quick do's and don'ts
A few habits will save you a lot of grief:
- Do use your original photo file. Don't upload a WhatsApp-forwarded copy or a screenshot — both are already compressed and shrunk, which is how "blurred/miniature" rejections happen.
- Do keep the paper flat and the camera steady when capturing a signature. Don't sign tiny; fill a good part of the page.
- Do check the exact requirement in your specific notice. Don't assume every SSC exam uses identical numbers — they're usually the same, but it costs nothing to confirm.
- Do keep a properly-sized copy of your photo and signature saved somewhere. You'll reuse them across multiple SSC applications and the OTR profile, so getting them right once saves repeated headaches.
One file, done right, reused everywhere
Here's the quietly satisfying part: once you've made a correct signature and photo, you're set for the whole season. SSC's One Time Registration means you typically upload these to your profile and reuse them across CGL, CHSL, MTS, GD, Stenographer and the various Selection Posts. Get the file right a single time and the upload step stops being a battle.
So if you're staring at a red rejection message right now, take a breath — it's not you, and it's not broken. It's just a file that needs to hit a few specific numbers. Open the SSC signature and photo resizer, drop in your signature, straighten and crop it, hit generate, wait for the green light, and upload the result. The thing that's been eating your evening will be sorted in about two minutes — and you can get back to the part that actually matters: preparing for the exam.
